*This course now includes the 2020 AHA & ECC Interim Guidance for Basic Life Support (CPR) in relation to the resuscitation of, suspected or confirmed, COVID-19 patients. Look for these interim updates throughout the course.
Sudden cardiac arrest (SCA) is a leading cause of death among adults in the United States. Cardiopulmonary resuscitation (CPR) dramatically increases the chance of survival for a victim suffering from SCA.
CPR is a combination of chest compressions and breaths, and provides critical blood flow and oxygen to the heart and brain. If CPR is started within three to five (3-5) minutes of collapse, it increases a victim’s chance of survival and reduces the chance of permanent damage.
This course follows the most recent and updated 2020 Emergency Cardiovascular Care (ECC) and AHA guidelines, and has been designed to help you acquire the skills you will need to effectively respond in an emergency situation.
It is important to always check the scene and ensure your safety first. Remember to stay alert so you are able to identify and assist in an emergency.
2020 Interim Guidance for suspected or confirmed COVID-19 patients: Put on PPE immediately & limit the personnel around you after you verify that the scene is safe.
It is critical to understand that dialing 9-1-1 is one of the most important steps you can take to save another’s life.
1. Your safety is first, so leave the scene if you are at risk.
2. While helping the victim, protect yourself from transmission of possible diseases.
Use preventive breathing barriers / personal protective equipment (PPE) when available.
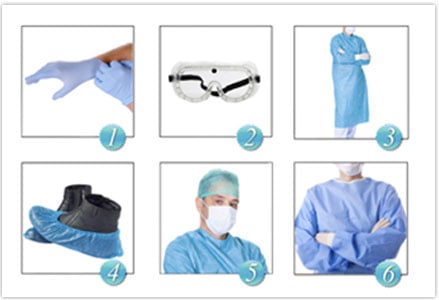
PPE includes: Gloves, Goggles (eye protection), Gown, Lab Coat or Apron, Shoe Covers, Face Shields / Masks, and Cap
3. Use disposable gloves to avoid direct contact with blood / bodily fluids. [View Tip]
4. If you suspect that a victim has suffered a spinal or neck injury, do not move or shake the victim.
When preparing to perform CPR, keep in mind ECC’s Chain of Survival. These are the five crucial steps that should be performed in an emergency.
|
|
 |
|
The 2010 ECC and AHA updates changed the CPR sequence from A-B-C to C-A-B. Often in the A-B-C method chest compressions were delayed. With the new Compressions – Airway – Breathing method a victim receives compressions faster, providing quicker critical blood flow to the vital organs.
The sequence of steps for conducting CPR using the C-A-B method (detailed further in following chapters):
|
1. |
“C” for Compressions
|
|
2. |
“A” for Airway
|
|
3. |
“B” for Breathing
|
2020 Interim Guidance for suspected or confirmed COVID-19 patients:
In these times when everyone is being affected by the Coronavirus disease (COVID-19), many lay responders/community rescuers are unlikely to have access to adequate PPE. They are also at an increased risk of exposure to COVID-19 during CPR, which might make individuals hesitant to act in times of cardiac emergencies.
However, lay rescuers of family members are likely to have already been exposed to COVID-19. Below are the primary interim changes to CPR during COVID-19 times.
PPE should be put on before conducting CPR.
For Adults:
·> Perform at least hands-only CPR after a cardiac arrest event has been identified
·> A face mask or a cloth that covers the mouth and nose of the rescuer and/or victim may reduce the risk of COVID-19 transmission to a non-household bystander
For Children
·> Perform chest compressions and consider mouth-to-mouth ventilation
·> A face mask or cloth that covers the mouth and nose of the rescuer and/or victim may reduce the risk of COVID-19 transmission to a non-household bystander.
Per the 2015 updates, you should deliver at least 100 to 120 chest compressions per minute (previous rate was 100 compressions / minute). Recent science indicates that more compressions lead to a higher survival rate. This new update sets an upper limit for the chest compression rate, as excessive compressions and depth can adversely affect a patient’s outcome.
The Hands-Only CPR method is recommended for use on teens or adults that you witness suddenly collapse. This is CPR without the rescue breaths.
You would need to: 1. Call 9-1-1 and stay on the phone with the dispatcher as you 2. Push hard and fast to give chest compressions. This method is also effective for individuals who have been trained in CPR before but may not remember all the steps of conventional CPR.
*The Good Samaritan Law is intended to reduce bystanders’ hesitation to assist in an emergency.
|
1. |
**Check the scene for your safety and prepare to use any personal protective equipment that may be accessible. |
|
2. |
Check to see if the patient is breathing. Tap and shout, “Are you okay?” to see if victim is responsive. If unresponsive, continue with steps below.
|
|
3. |
Activate EMS by calling 9-1-1 or send someone to call 9-1-1 if available. Get an AED if available. |
|
4. |
Check the victim’s pulse. Don’t take more than 10 seconds to check for the pulse. Begin CPR if you cannot locate or are unsure of a pulse.
|
|
*Note: |
For CPR emergencies, an adult is anyone who is going through or gone through puberty. |
|
1. |
Place yourself at the victim’s side. |
|
2. |
Ensure that the victim is lying on his back on a firm, flat surface.
|
|
3. |
Immediately remove clothes from the chest. |
|
4. |
Form the correct hand position for chest compressions:
|
|
5. |
Compress / push down hard and fast at least 2 inches deep, at a rate of at least 100 compressions per minute. |
|
6. |
Make sure the chest rises back up completely after each compression. |
|
1. |
Let the second rescuer activate the Emergency Response System (call 9-1-1) and get the AED. |
|
2. |
The first rescuer should stay with the victim and be prepared to remove clothes from the chest and start CPR. |
|
3. |
When both rescuers are present with the victim, they should take turns doing chest compressions; switching approximately every 2 minutes. The rescuers should remind each other to push down at least 2 inches and watch for proper chest recoil. |
After every 30 compressions, open the airway and give two rescue breaths. If you can give breaths, you will help the victim even more.
To give breaths you must first open the airway and ensure there are no obstructions. The tongue is the most common obstruction. If you see any foreign object and it can be removed easily, remove it.
Perform the head-tilt chin-lift motion: Tilt the head and pinch the nose with the same hand. With the other hand lift the chin - this will open up the airway.
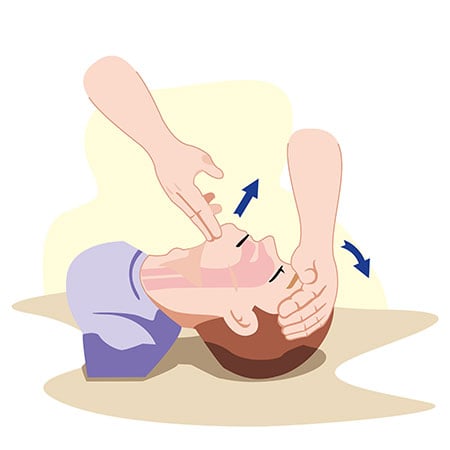
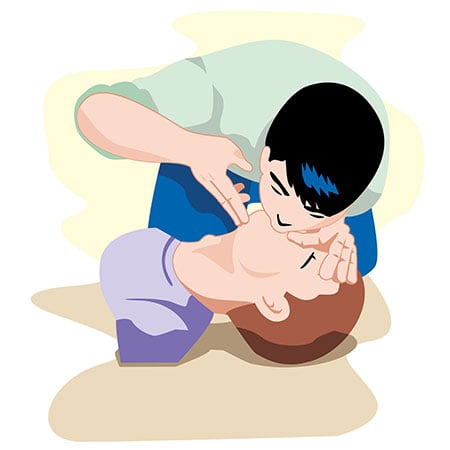
Hold open the airway, pinch the nose, and blow air into the mouth. Be sure to place your mouth tightly over the victim’s mouth; use a barrier if available. Give 2 breaths that last one (1) second each. Ensure that the chest rises and falls between each breath.
If the breaths you give do not go in, continue to give chest compressions following the same 30:2 ratio until the breaths go in. Do not interrupt compressions for more than 10 seconds.
Continue to give sets of 30 chest compressions and 2 rescue breaths, with at least 100 compressions per minute until an AED or EMS arrives, or the person starts to breathe (shows signs of life).
If a person begins to breathe, roll him/her to their side in a recovery position until EMS arrives. When in recovery position, vomit and other fluids will drain from the mouth. While moving the person take special care of the neck, head and back.
** Note: [2020 Interim Guidance] Many lay responders may be hesitant to provide rescue breaths because of fear of transmission. Responders should at least perform hands-only CPR.
Usually a child’s heart stops because of a breathing emergency. For this reason, giving breaths with compressions is very important for children.
When responding to a child in a CPR emergency follow the same steps for compressions, airway and breathing as detailed for adults. Listed below are the EXCEPTIONS for child CPR.
|
1. |
Perform CPR First (for children and infants) – Call 9-1-1 AFTER you have given 5 sets of 30 compressions and 2 breaths. |
|
2. |
Compressions: Place the heel of one hand in the center of the chest, between the nipples. You may not need to use the second hand, but use if needed for proper compression. As in adult CPR, compress / push down hard and fast at least 2 inches deep, at a rate of at least 100 compressions per minute. 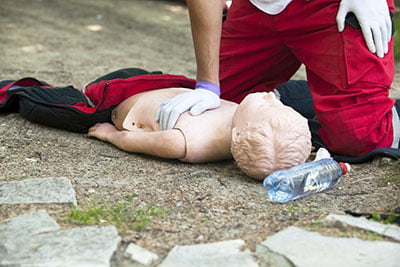 |
|
3. |
Airway and breaths techniques are the same as for an adult. |
Usually an infant’s heart stops because of a breathing emergency. For this reason, giving breaths with compressions is very important for infants.
The process for responding to an infant is the same as responding to a child except for the following:
|
1. |
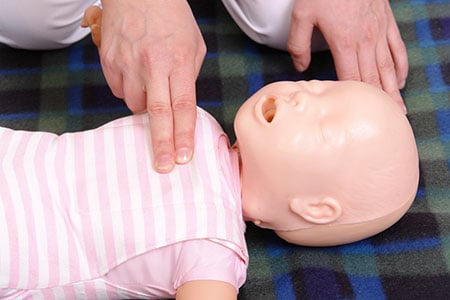
Compressions: Place two fingers on the center of the chest between the nipples. Compress / push down hard and fast about 1½ inches, at a rate of at least 100 compressions per minute. |
|
2. |
Airway: When you tilt an infant's head to open the airway, be sure not to push back too far. This may block the infant's airway. |
|
3. |
Breaths: When you prepare to give breaths, cover the infant's mouth and nose with your mouth. If you are unable to cover both the mouth and nose, cover the nose and give breaths. Be sure the infant's mouth is closed so air does not escape. 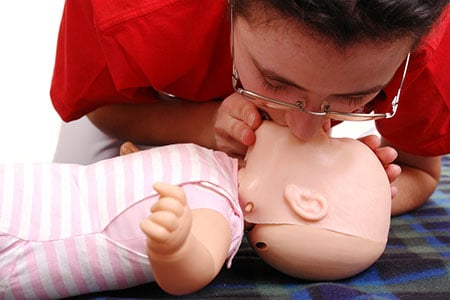 |
An Automated External Defibrillator (AED) machine shocks the heart and enables it to restart with a normal rhythm. The AED device will instruct you step-by-step, and will tell you to push a button if it determines that a shock is required.
A diagram will show you where to place the pads and when to restart compressions. If a second rescuer is present, he / she can help to attach AED pads while the first rescuer continues to perform CPR.
|
1. |
Turn the AED “on” and follow the instructions given through voice commands. They should be self-explanatory. |
|
2. |
An AED device should only be used on adults and children who are 8-years and older. |
|
3. |
The survival rate for a cardiac emergency patient increases to almost 30-70 percent if an AED is used in a timely manner. |
|
4. |
Do not touch the person while the AED is analyzing. When the device is defibrillating you could be shocked, so be careful. |
|
5. |
Do not use an AED on a person who is in contact with water. Be sure to move him or her away from the puddle of water, swimming pool or rain before defibrillating. |
|
6. |
An AED can be used on patients with an implant-device. |
|
7. |
Before defibrillating, take off visible medication patches from the person using disposable gloves. |
|
8. |
Shock pads should be used on clear skin (shave those parts if necessary. Ensure that the chest is not wet.) |
|
9. |
Never turn the AED off or remove the pads. The machine will instruct you to begin CPR after shock is delivered. |
|
10. |
Child AED Usage: AED will instruct you to use child pads or a child key / switch. |
Remember if an AED is not present, start CPR immediately!
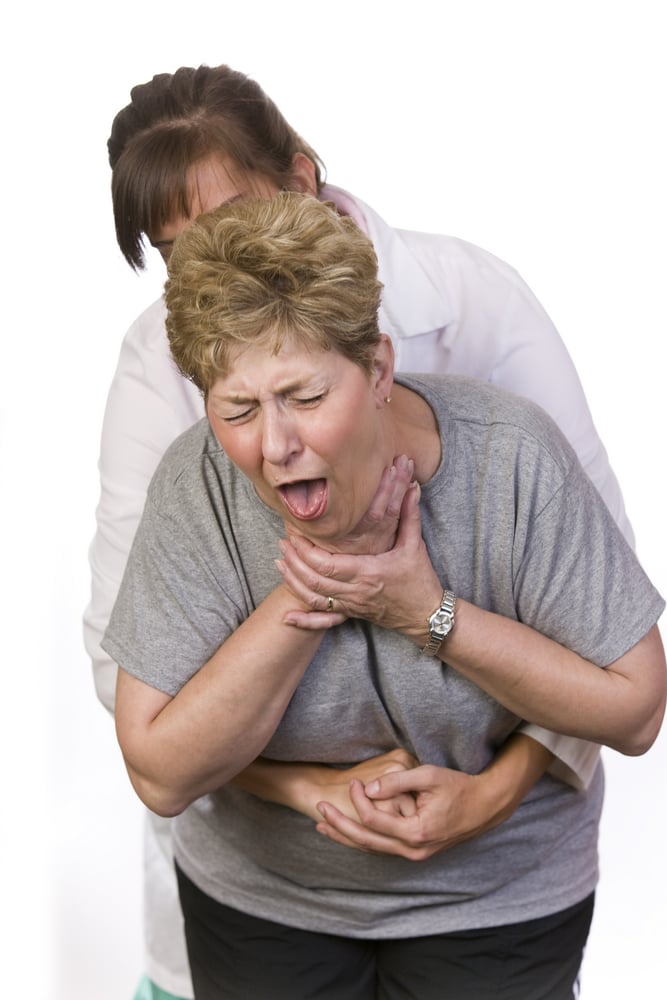
If an adult or child is choking, they may use the universal choking sign. This is when one holds the neck with one or both hands.
|
1. |
If a person is choking, ask “Are you choking?” If the person nods or is unable to breathe or respond, tell the person that you are trained in CPR and that you are going to help. |
|
2. |
Stand or kneel behind the person. |
|
3. |
Make a fist with one hand and place it on the person’s abdomen just above the belly button. |
|
4. |
Grab your fist with the other hand and give quick, upward abdominal thrusts. |
|
5. |
Continue abdominal thrusts until the object is dislodged and the person can breathe or cough forcefully, OR person becomes unconscious. |
|
6. |
For pregnant women or someone too large for you, give chest thrusts instead of abdominal thrusts. |
|
7. |
If an adult or child becomes unconscious, follow the steps to perform adult / child CPR. |
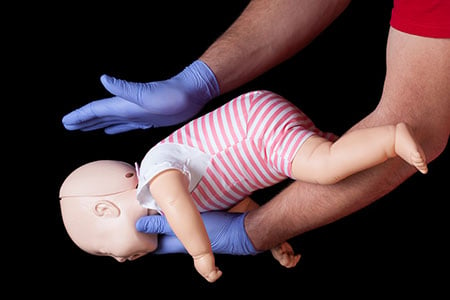
If you think that there is a conscious choking infant who cannot cough, cry or breathe, you will need to give 5 back blows and 5 chest thrusts. Follow these steps:
| 1. | Position the infant face-up on your forearm with his or her head lower than your chest. Support the head and neck by holding it firmly in the palm of your hand. |
| 2. | Then turn the infant face-down while supporting your forearm on your thigh. |
| 3. | With the heel of your hand give 5 back blows between the infant’s shoulder blades. |
| 4. | If the object is not ejected with back blows, turn the infant face-up and give 5 chest thrusts. |
| 5. | To give chest thrusts, push down with two to three fingers at the center of the chest as you do for infant CPR. |
| 6. | Continue to give back blows and chest thrusts until the object is forced out, the infant begins to respond, or the infant becomes unconscious. |
| 7. | If an infant becomes unconscious, follow the steps to perform infant CPR. |
A breathing emergency (considered to be a medical emergency) is any respiratory problem that can threaten a person’s life. It can range from not being able to take a breath to not being able to breathe at all.
|
Signs and Symptoms: |
| Breathing is very rapid or very slow |
| Chest pain |
| Confused and aggressive behavior |
| Cough |
| Noisy breathing (wheezing or whistling sounds) |
| Pale or blue face, lips and fingers |
| Shortness of breath or troubled breathing |
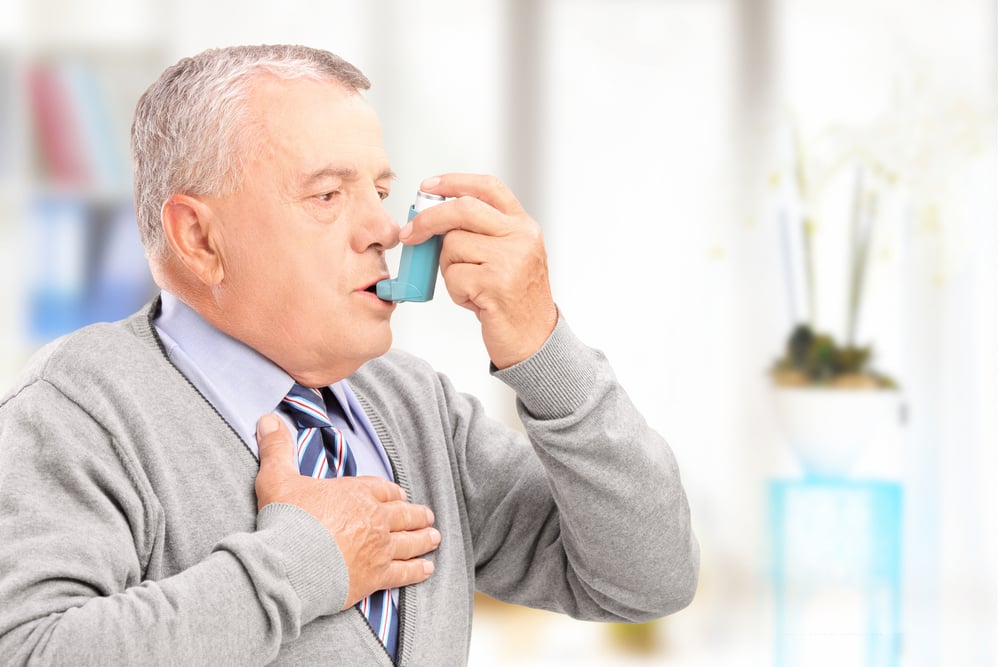
Asthma is the third highest cause of hospitalization amongst those under the age of 15. Many people that have this medical condition are aware of it and carry an inhaler for use in an emergency.
Asthma attacks can be triggered by many things, such as:
 |
|
|
1. |
Assess the scene and check for your safety. |
|
2. |
Ask the person if he/she has prescribed medication. Get the medicine for the person if he/she cannot access it.
|
|
3. |
Call 9-1-1 if the person does not have medicine or the breathing emergency worsens. |
|
4. |
Loosen any tight clothing (especially around the neck). |
|
5. |
Try to keep the person calm, and stay with the person until advanced medical help arrives. |
|
6. |
If necessary, provide CPR. If you do not know how, give Hands-Only CPR. |
A choking emergency (considered to be a medical emergency) is when an obstruction (object or food) blocks the airway and prevents air from getting to the lungs. The person is not able to breathe normally or cough. This section covers adult and child choking emergencies.
Causes: |
| Consumption of alcohol / drugs |
| Hard objects (i.e., marbles, coins) are more common hazards amongst children |
| Not chewing food properly |
| Poor fitting dental work |
| Talking or laughing while eating |
 |
Signs and Symptoms: |
| Coughing |
| Difficulty breathing or wheezing |
| Gasping |
| Holding the neck with one or both hands; using the universal choking sign |
| Inability to talk |
| Panic |
| Passing out |
| Turning blue |
| Shortness of breath or troubled breathing |
|
1. |
If a person is choking, ask “Are you choking?” If the person nods or is unable to breathe or respond, tell the person that you are trained in CPR and that you are going to help. |
|
2. |
Stand or kneel behind the person. |
|
3. |
Make a fist with one hand and place it on the person’s abdomen just above the belly button. |
|
4. |
Grab your fist with the other hand and give quick, upward abdominal thrusts. |
|
5. |
Continue abdominal thrusts until the object is dislodged and the person can breathe or cough forcefully, OR person becomes unconscious. |
|
6. |
For pregnant women or someone too large for you, give chest thrusts instead of abdominal thrusts. |
|
7. |
If an adult or child becomes unconscious, follow the steps to perform adult / child CPR. |
The relationship between the brain and its central nervous system is very interrelated with the functioning of each and every other part of the body. The nervous system controls: the five senses (sight, smell, taste, hearing, touch), the ability to think and reason, voluntary and involuntary functions, and regulates blood flow and blood pressure.
For this reason, head and spinal injuries may have a very significant affect on another part of the body. Prompt and timely First Aid given to nervous system emergencies is very crucial.
|
Signs and Symptoms: |
| Chest discomfort: squeezing, pain, pressure |
| Confusion |
| Discomfort in: arms, back, neck, jaw, abdomen |
| Fluid or blood drainage from the nose or ears |
| Headache |
| Nausea or vomiting |
| Numbness, weakness, tingling |
| Paralysis (inability to move one part or any part of the body) |
| Seizures |
| Shortness of breath: nausea, sweating, dizziness |
| Slurred speech, loss of speech, trouble speaking |
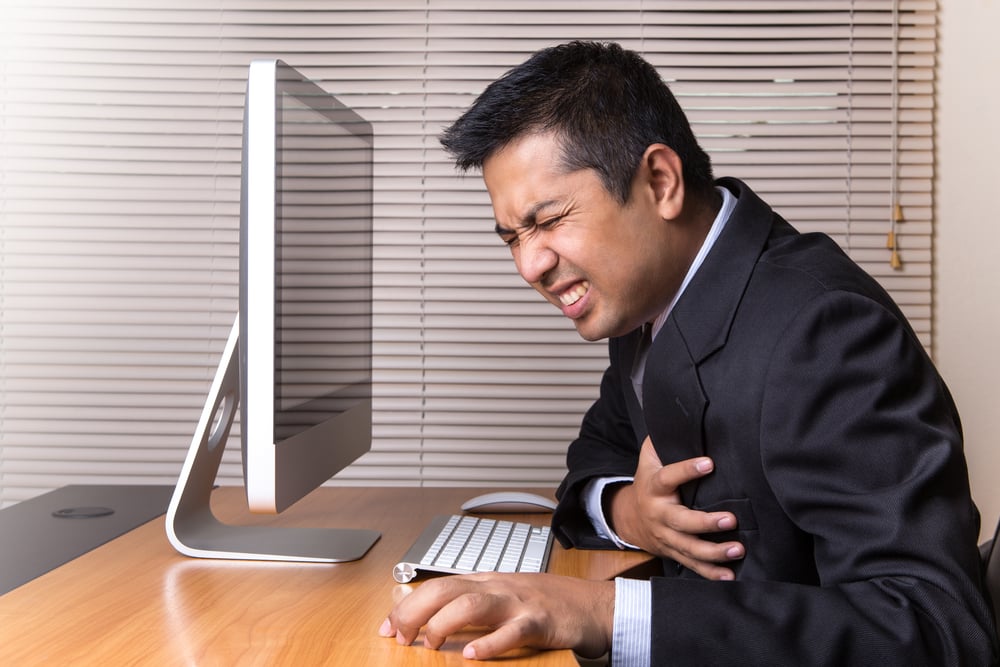
A heart attack develops when blood flow is blocked and a segment of your heart muscle / tissue dies or is damaged.
Most commonly you can tell if someone is having a heart attack if they complain of chest pain. They may also experience uncomfortable pressure, nausea, shortness of breath, and/or discomfort in the arms, back, neck, jaw and abdomen.
 |
A seizure is a sudden attack, which involves abnormal electrical activity in the brain. A person may experience mild shakes or more severe convulsions (rapid and uncontrollable shaking). Most seizures will stop within a few minutes of onset.
Seizures can be caused by head injuries, poisons, missed medications, low blood sugar or a medical condition called epilepsy.
A stroke usually occurs very suddenly when there is a problem with the blood supply to the brain. The supply gets blocked or a blood vessel within the brain ruptures.
Some specific signs and symptoms include: sudden and severe headache, dizziness, loss of consciousness or balance, slurred speech, drooling, inability to understand words, weakness, and/or paralysis on one side of the body.
The spinal cord primarily transmits signals between the brain and the rest of the body, and controls reflexes. Injuries to the spine can cause a person to lose the inability to move parts of the body.
A person may have a spinal or head injury if he/she was struck in the head/spine, fell, was assaulted, experienced a sports injury, or was in a car / motor vehicle accident (without a helmet).
The person may suddenly get sleepy, experience nausea, vomit, get a headache, have trouble walking and talking or not respond all together.
| 1. | Assess the scene and check for your safety. |
| 2. | Activate EMS (Call 9-1-1) and follow the dispatcher instructions. |
| 3. | Get an AED or First Aid kit if available. |
| 4. | If person is experiencing:
|
| 5. | If necessary, provide CPR. If you do not know how, give Hands-Only CPR. |
When a person has an allergy, he or she experiences an immune response to a substance that is usually not harmful. An allergy emergency may occur if a person is exposed to this allergen. An allergic reaction may become severe if not treated in a timely manner.
|
Signs and Symptoms: |
| Itchy skin |
| Nausea, vomiting, diarrhea (stomach pain) |
| Rash, hives, redness |
| Signs of shock |
| Stuffy nose, sneezing |
| Swelling of the tongue and face |
| Troubled breathing |
This is a severe, life-threatening allergic reaction. It occurs suddenly, and within seconds or minutes after contact with the allergen.
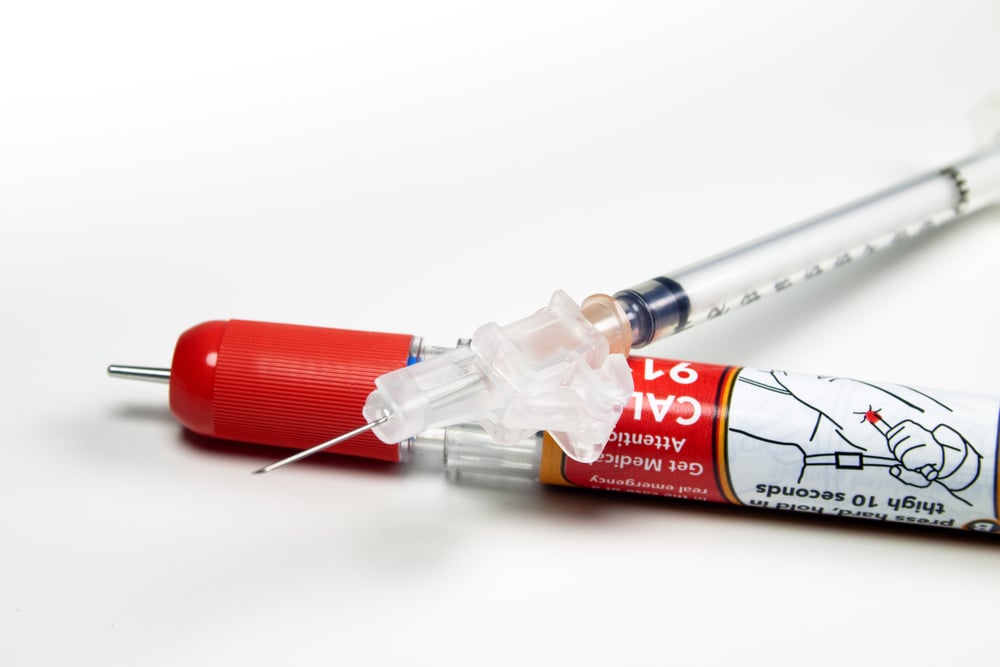
A reaction of troubled breathing can cause obstructions in the airway and even lead to shock. Anaphylaxis requires immediate medical treatment, including the epinephrine injection and a trip to the hospital.
 |
| 1. | Assess the scene and check for your safety. |
| 2. | Activate EMS (Call 9-1-1). |
| 3. | Get a First Aid kit if available. |
| 4. | Many people that have an allergy carry an epinephrine pen. If the person responds, and has an epinephrine pen, help him get it. The person should know how to use it and can administer himself if necessary. If you are allowed to use an epinephrine pen, ask for consent and administer the injection. |
| 5. | Rub the spot for 10 seconds, dispose of the injection properly and record what time the shot was given. |
| 6. | If necessary, provide CPR. If you do not know how, give Hands-Only CPR. |
Accidents from bites and stings can happen at home, work or even while you are traveling. It’s important to understand the various types of bites and stings and what First Aid care should be provided. If one experiences an allergic reaction to the bite / sting, First Aid may involve the use of an epinephrine pen (Chapter 7).
|
Signs and Symptoms: |
| Abdominal pain |
| Feeling generally unwell |
| Joint pain |
| Lack of appetite |
| Muscle spasms |
| Puncture marks on the skin |
| Rash, headache and fever |
A bite that punctures the skin can cause bleeding and lead to an infection. Bites that do not break the skin may require minor First Aid. It’s important to understand that the reaction to a punctured bite will vary depending on the germs that were in the biter’s mouth / saliva.
If you notice that an animal is acting strangely, be sure to keep your distance. Some animals may carry rabies and require immediate medical attention, i.e., dog, cat, skunk, bat, raccoon or other wild animals.
 |
Poisonous snakes release venom when they bite. You should always assume that a snake is poisonous if you are not able to tell from the bite mark. Symptoms of a poisonous snakebite can include: pain, swelling near the bite area, nausea, vomiting and weakness.
Unless a person is allergic to the source of the sting, a person may experience a minor reaction. Stings usually lead to itching, swelling and minor pain.
Remember some stings may be more dangerous, if the source is poisonous (i.e., scorpion, poisonous spider). In these instances a person will experience more severe symptoms such as: fever, severe pain, seizures, vomiting, breathing problems and may even stop responding.
| 1. | Assess the scene and check for your safety. |
| 2. | Activate EMS (Call 9-1-1). |
| 3. | Get a First Aid kit and wear personal protective equipment. |
| 4. | If person is experiencing:
|
| 5. | In all instances, clean the bite / sting area with soap and running water. |
| 6. | If necessary for severe reactions, provide CPR. If you do not know how, give Hands-Only CPR. |
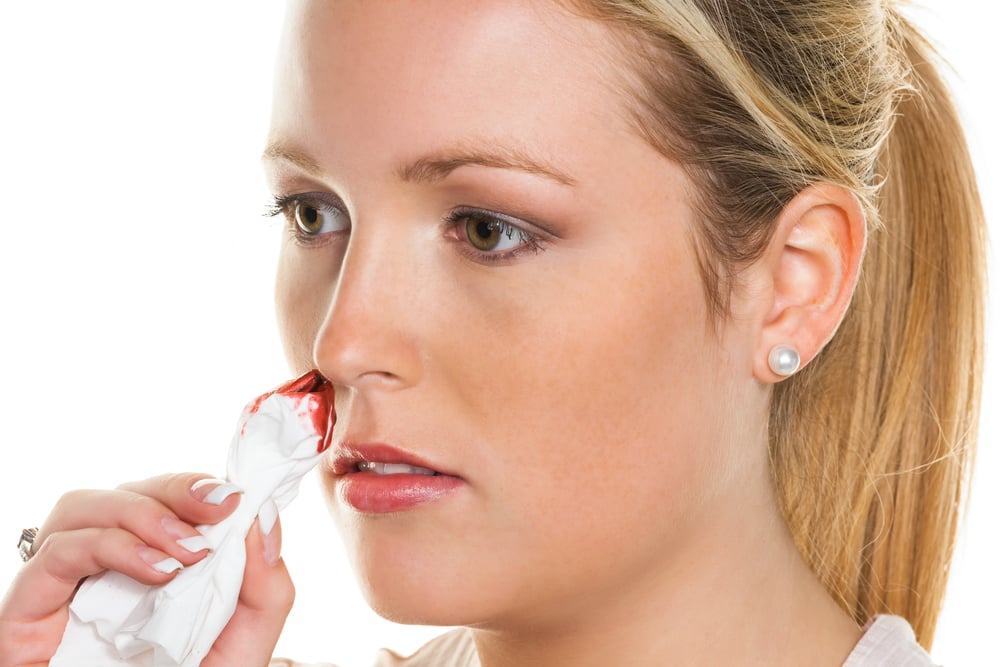
Wounds are an injury of the soft tissue (tissue in the body that is not bone). Wounds are generally classified as either a closed or open wound.
|
 |
Signs and Symptoms: |
| Bleeding |
| Bruising |
| Pain |
| Redness, swelling |
A closed wound is a wound on the skin’s surface that does not break the skin. A common closed wound is a bruise, which develops when the body is bumped or hit. A more serious closed wound may be caused by a violent force hitting the body. The person can severely damage tissues, blood vessels and muscles, leading to heavier internal bleeding.
An open wound causes a break in the skin. The wound can range from something minor like a scrape to a deeper, puncture of the skin. A minor open wound includes small cuts, scrapes and abrasions. Immediate medical attention may be required for major open wounds that are heavily bleeding (i.e., amputation).
| 1. | Assess the scene and check for your safety. |
| 2. | Get a First Aid kit and wear personal protective equipment. |
| 3. | If person is experiencing:
|
| 4. | Activate EMS (Call 9-1-1) if there is a lot of bleeding, trouble breathing, signs of shock or the person has a major open or closed wound. |
| 5. | If necessary in severe conditions, provide CPR. If you do not know how, give Hands-Only CPR. |
This emergency occurs when a muscle, bone or joint moves in a direction that it is not supposed to go. This movement can lead to broken bones, sprains, fractures and other injuries.
|
Signs and Symptoms: |
| Bruising and swelling |
| Bone fragment(s) sticking out |
| Coldness, numbness |
| Discoloration (blue) |
| Deformity |
| Inability to use the affected part normally |
| Pain |
| Snapping or popping sound at time of injury |
A fracture is a complete break, a chip or a crack in the bone. An open fracture involves an open wound, and is when a bone end tears through the skin. An open fracture is more dangerous and severe. However, a closed fracture is more common.
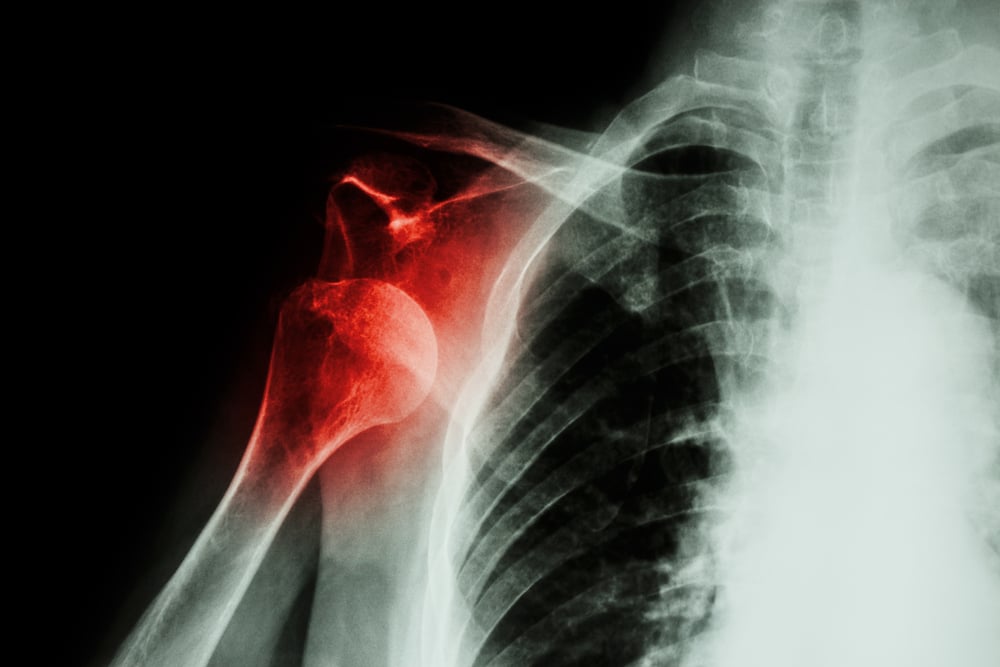
A dislocation is the movement of a bone at a joint from its normal position. When the bone is moved out of place, the joint no longer functions. Usually dislocations happen at the shoulder, elbow, wrist, jaw and hip.
A sprain is the tearing of the ligaments at a joint. Sprains mostly occur at the ankle, knee, wrist and fingers. A strain is the stretching and tearing of a muscle. They usually occur in the neck, back, thigh, or the back of the lower leg.
Use RICE method when dealing with a sprain or strain:
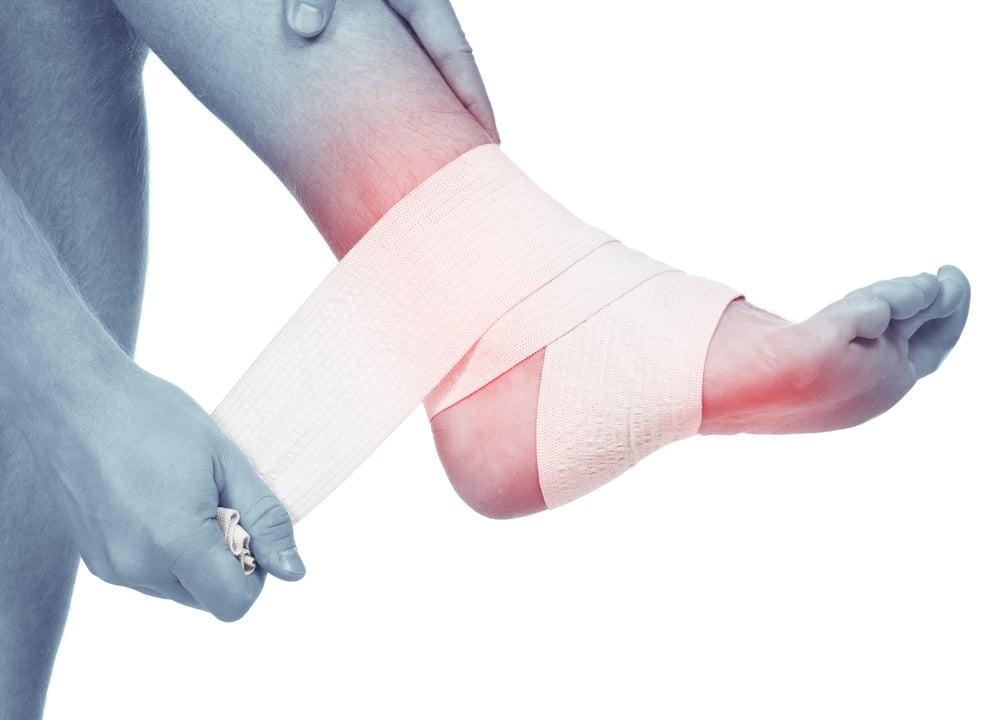 Rest: Do not move or straighten the injury.
Immobilize: Try to stabilize the person in the position he/she was found. Splint or sling the injured part only and use caution if moving the person.
Cold: Indirectly cool the part using ice for up to 20 minutes.
Elevate: Only elevate the part if it does not cause more pain.
| 1. | Assess the scene and check for your safety. |
| 2. | Get a First Aid kit and wear personal protective equipment. |
| 3. | Apply a clean dressing on any open wounds. Don’t move any body part that is deformed or bent (fractured). |
| 4. | If person is experiencing:
|
| 5. | Activate EMS (Call 9-1-1) if the open wound is large. |
The skin is the body’s largest organ. A burn is an injury to this organ, the skin. Burn treatments vary based on the severity of the injury.
|
Signs and Symptoms: |
| Blistering |
| Coughing, difficulty breathing, wheezing (burned airway) |
| Numbness in the skin |
| Oozing fluid |
| Pain |
| Peeling skin |
| Red, white or charred skin |
| Shock |
| Swelling |
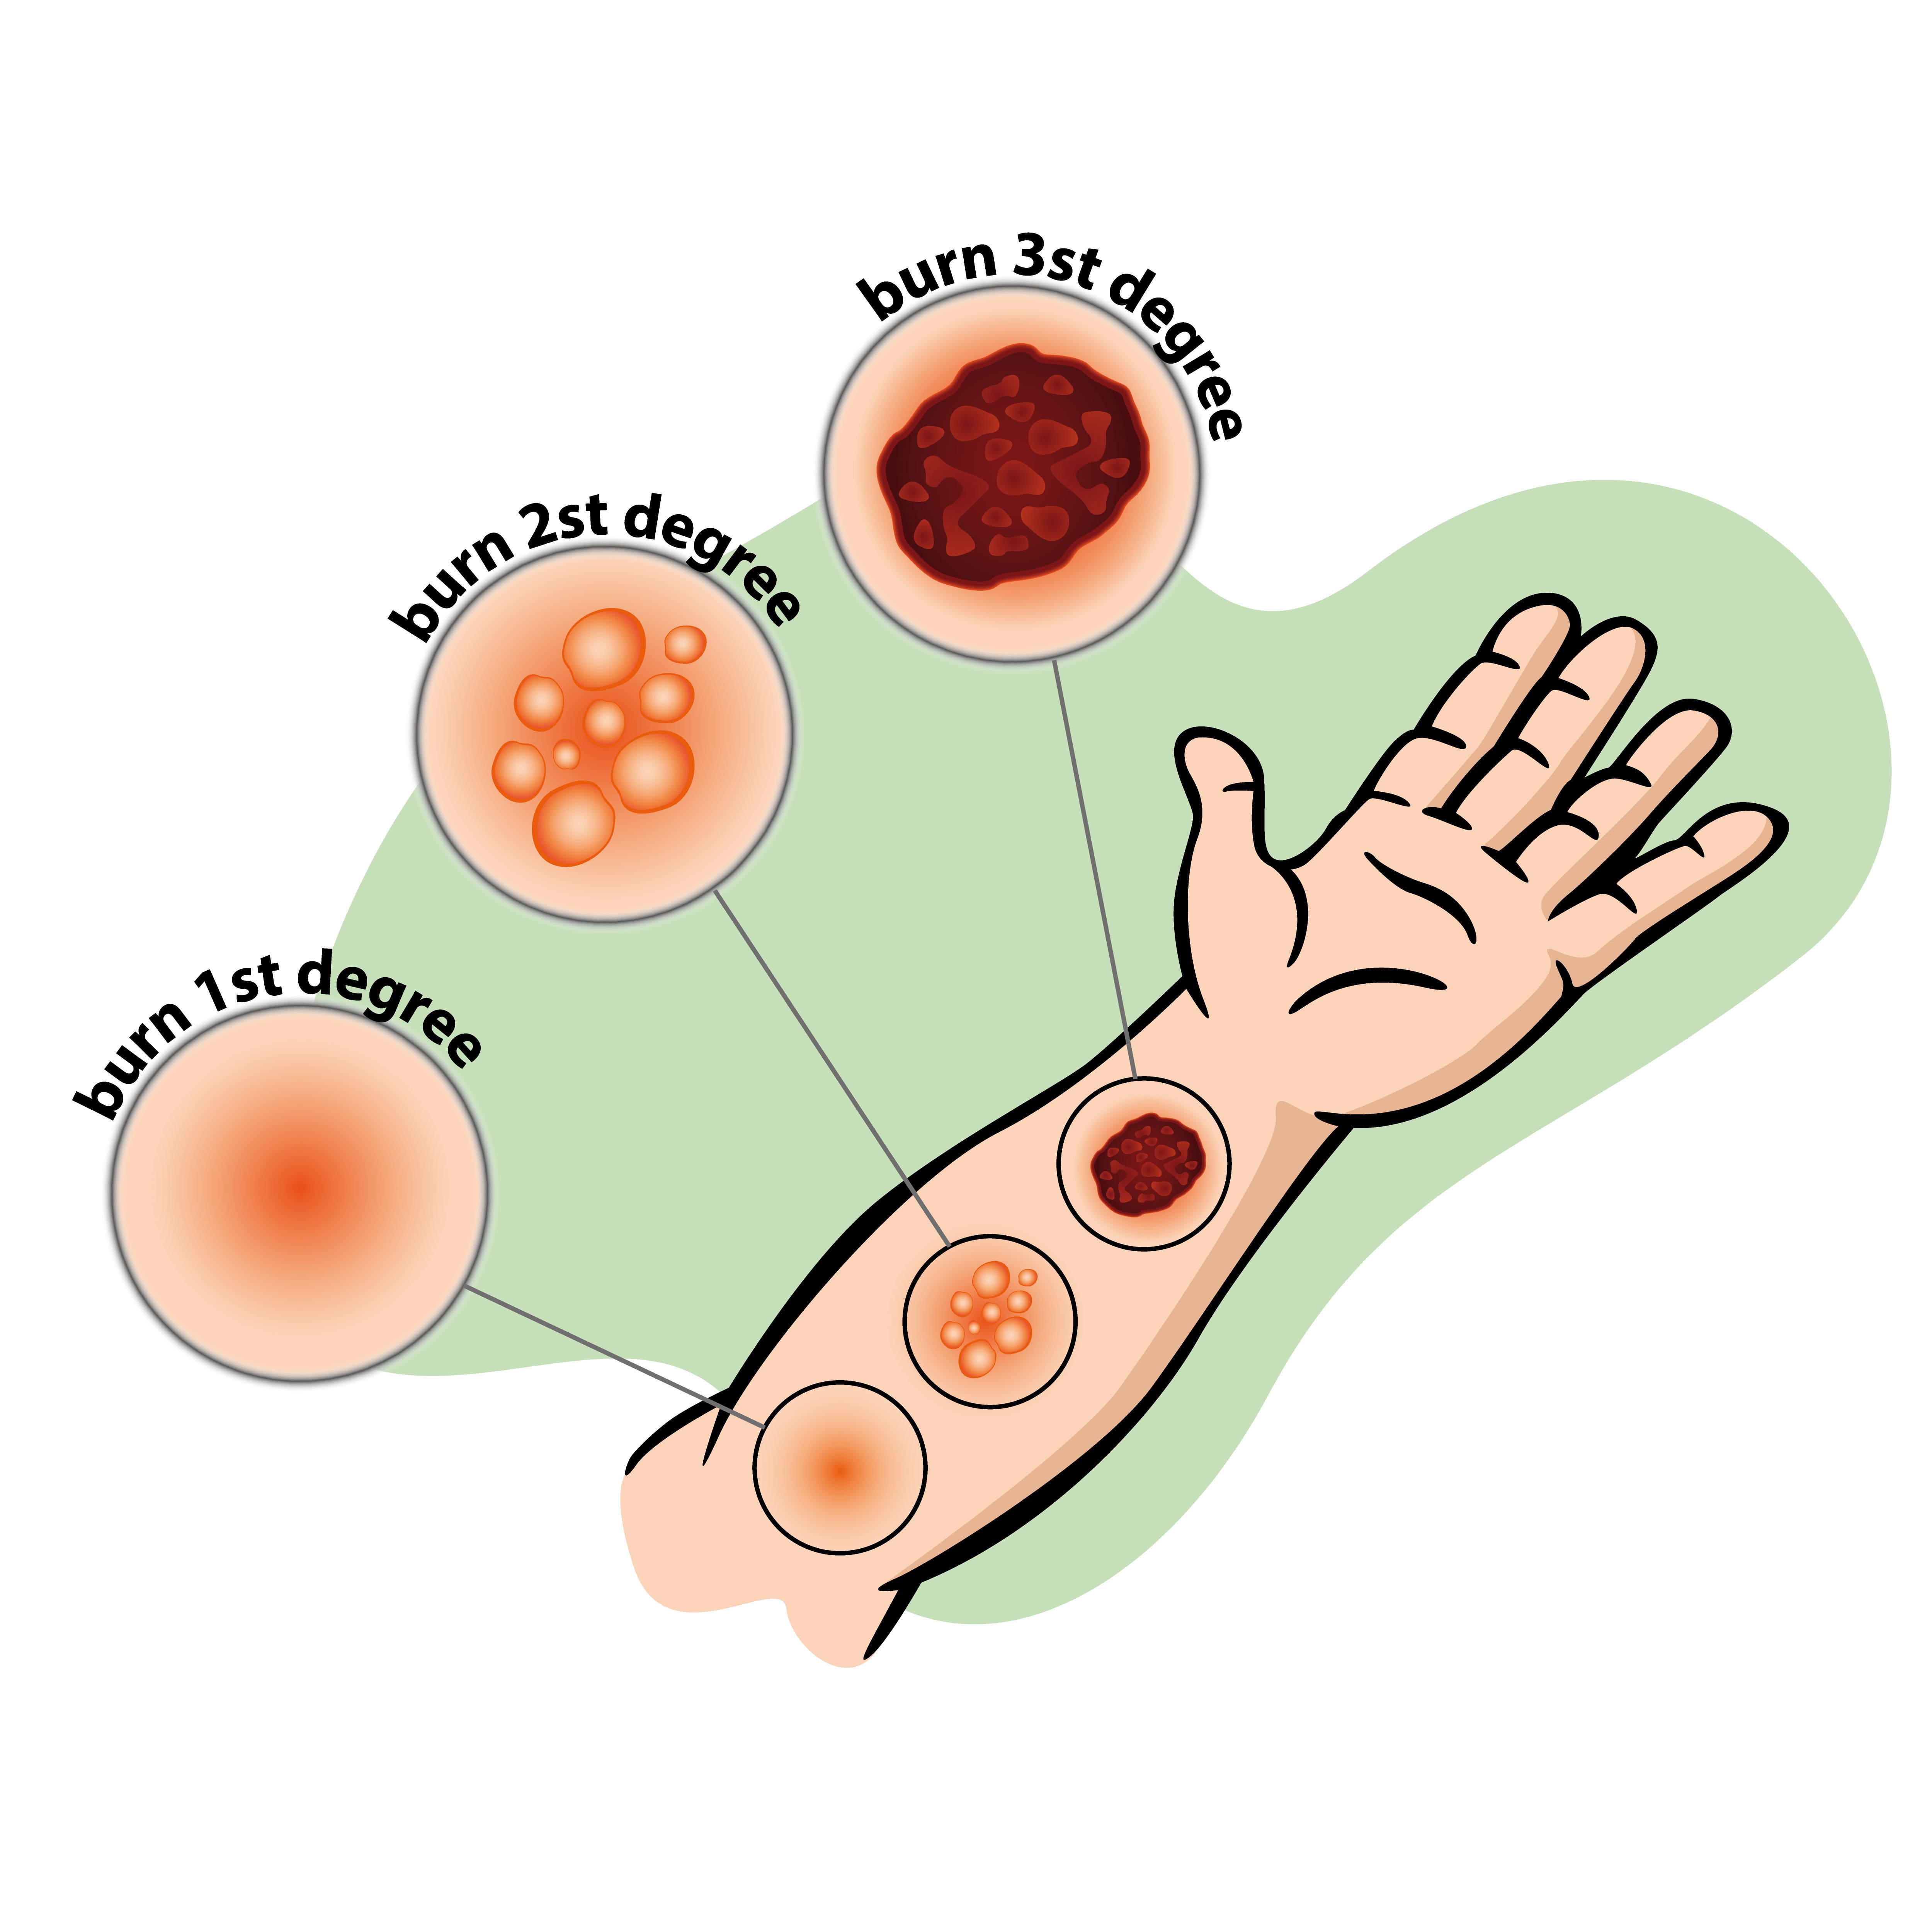 First Degree Burn (Superficial):
A first degree burn affects only the uppermost or outer layer of the skin. This burn causes mild redness, swelling and pain.
A second degree, or partial thickness, burn affects both the upper layer of the skin and the skin underneath it. Some specific symptoms for this burn include: redness, swelling, pain and blistering.
A third degree, or full thickness, burn is the most severe and destroys the deep layers of the skin. This can lead to numb skin and white or blackened skin.
| 1. | Assess the scene and check for your safety, especially at the scene of an electrical injury. Stay clear of the person if he / she is in contact with a power source that is on. |
| 2. | Get a First Aid kit and wear personal protective equipment. |
| 3. | If someone is on fire, have them Stop, Drop, and Roll – cover with a wet blanket to put the fire out. Replace with a dry blanket when the fire is out. |
| 4. | Activate EMS (Call 9-1-1) if the burn is severe (third-degree burn) or the scene becomes unsafe. |
| 5. | Remove clothing or jewelry that is NOT stuck to the skin / burn. |
| 6. | Cool all burns with cold water (not ice-cold water; don’t use ice) until the burning subsides; cover with a dry, sterile dressing. |
| 7. | If necessary in severe conditions, provide CPR. If you do not know how, give Hands-Only CPR. |
Now that you know the details of following the C-A-B method and performing Compressions, Opening the Airway, and Giving Breaths – let’s put the Adult CPR method together!
|
1. |
Make sure the scene is safe & put on PPE |
|
2. |
Tap and shout “Are you okay?” to check if the victim is responsive |
|
3. |
Shout for help |
|
4. |
Call 9-1-1 and Get the AED |
|
5. |
Check for a pulse (no more than 10 seconds) |
|
6. |
Give 30 Chest Compressions (2 inches deep) |
|
7. |
Open the Airway (head-tilt chin-lift) |
|
8. |
Give 2 Breaths (1 second each) |
|
9. |
Continue the 30 compressions and 2 rescue breaths cycle until help arrives (100 compressions per minute) |
A poison is a substance that can cause injury, illness or death if it enters the body accidently or deliberately. Some poisons are harmful if you breathe or swallow them, while others are harmful upon direct contact.
|
 |
Signs and Symptoms: |
| Burning around the lips and tongue |
| Burning or tearing of eyes |
| Change of consciousness |
| Chest or abdominal pain |
| Diarrhea |
| Hallucinations |
| Irregular pupil size |
| Nausea and vomiting |
| Skin color change |
| Seizures, headache, dizziness, weakness |
| Troubled breathing |
These poisons enter the body by swallowing and can include: food, drugs, alcohol, household and cleaning products, pesticides, plants and more. Some substances may not be poisonous if taken in a small quantity.
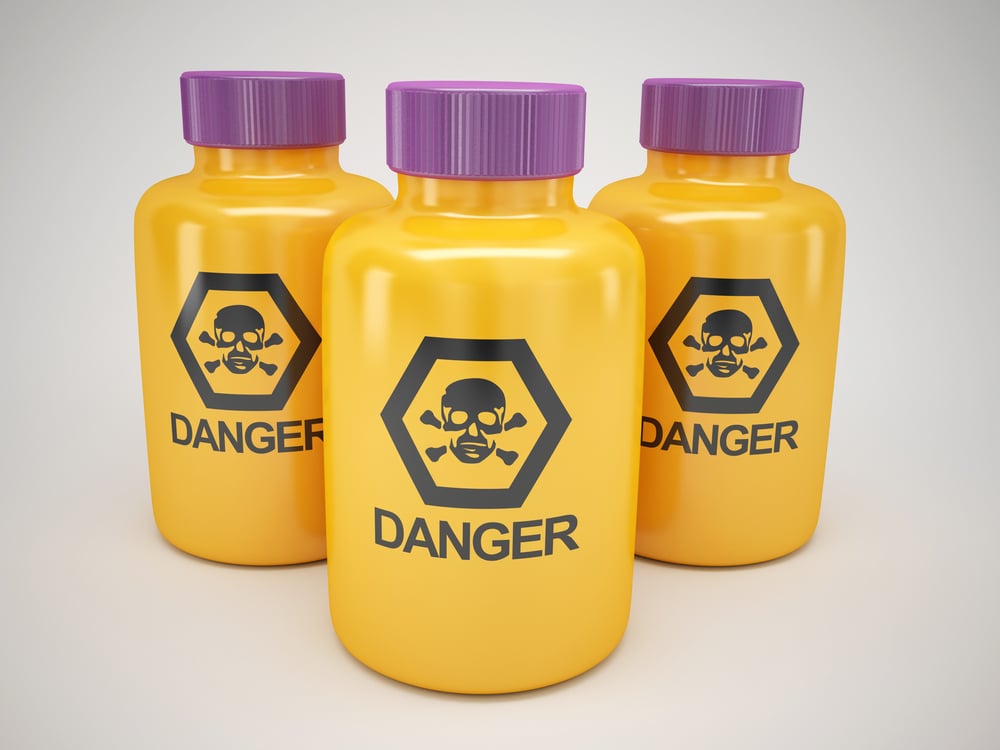
A person can also be poisoned by breathing in poison, like certain fumes and gases. Examples include: carbon monoxide (car exhaust), carbon dioxide (from sewers, wells), chlorine (found in swimming pools), glues and paints.
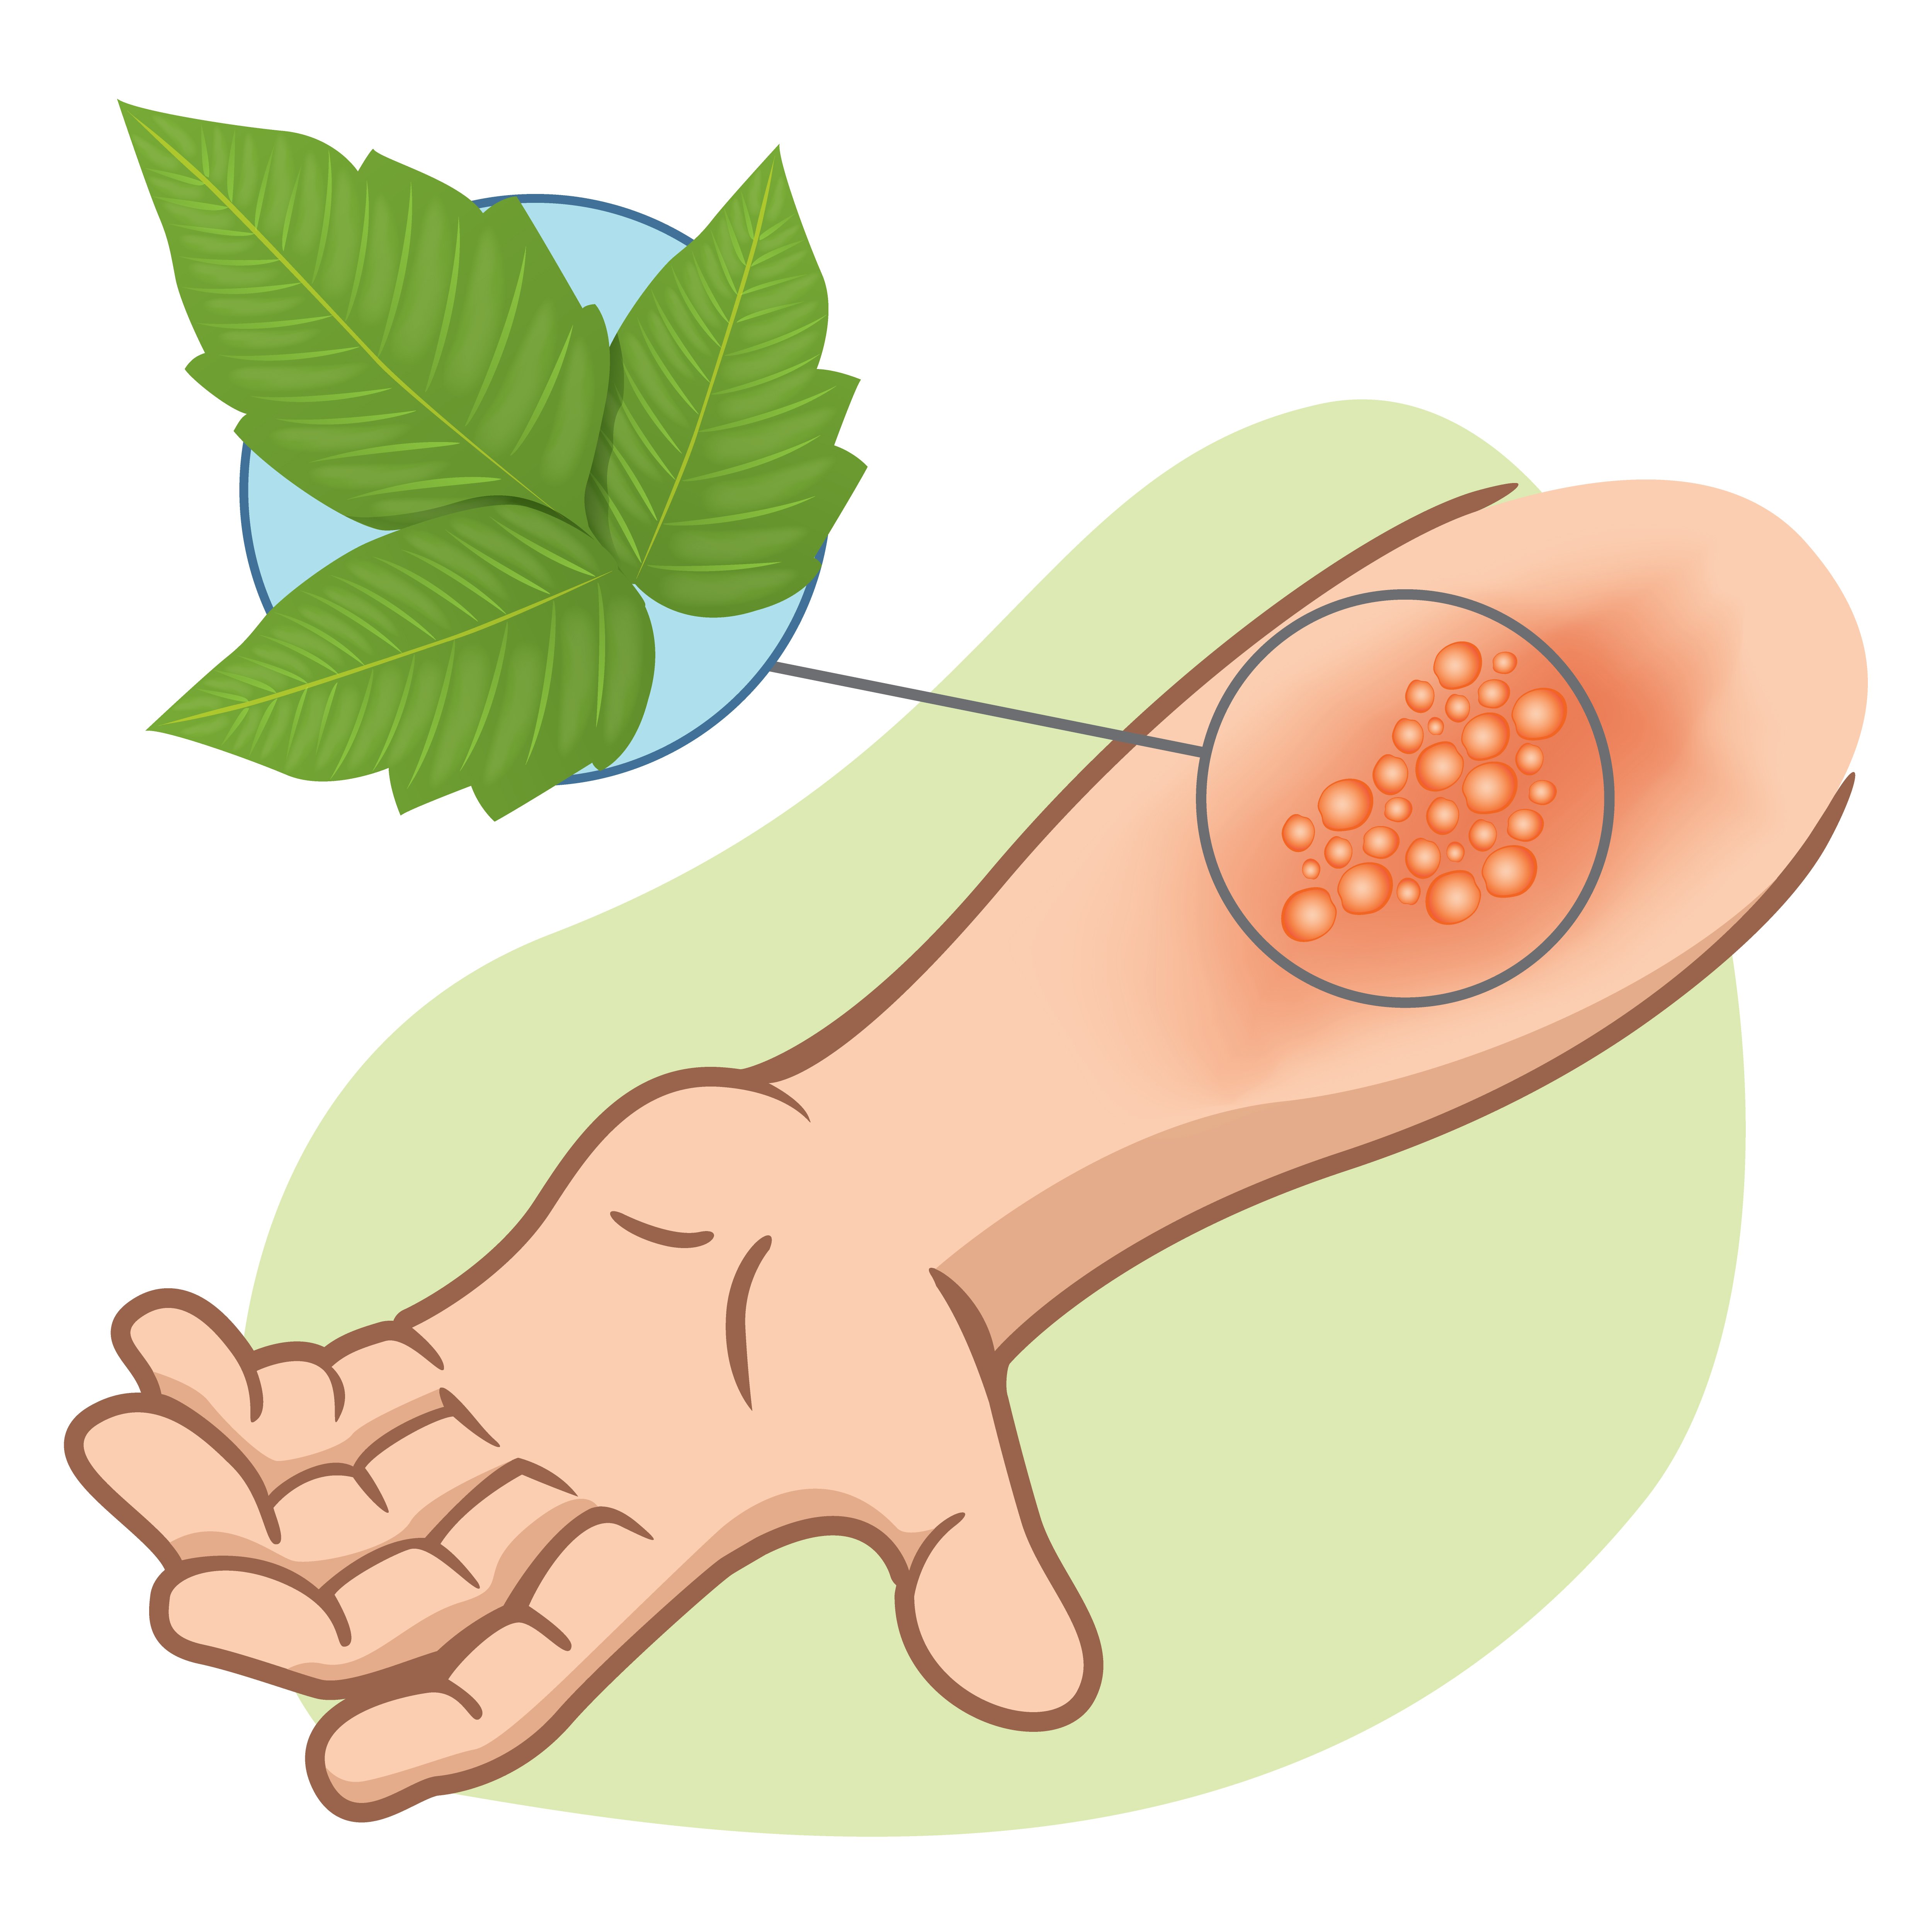
These poisons are absorbed through the skin, and include: plants (poison ivy, poison oak and poison sumac), fertilizers, pesticides and more.
An injected poison enters the body through bites or stings of insects, spiders, ticks, snakes and / or through medical hypodermic needles.
| 1. | Assess the scene and check for your safety. Do not approach the person if the scene is unsafe. Keep an eye out for signs of a poison – leaking containers, gases, etc. |
| 2. | Get a First Aid kit and wear personal protective equipment. |
| 3. | Activate EMS (Call 9-1-1) and call National Poison Control Center at 1-800-222-1222. Follow dispatcher instructions. Gather the following information and inform poison control of what you learn:
|
| 4. | If possible, remove the poison. Remove any contaminated jewelry or clothing and brush off solid substances with gloved hand. |
| 5. | Rinse contaminated area with water for at least 20 minutes. |
| 6. | Move the person to a poison-free scene, if possible. |
| 7. | If CPR is required, be sure to wear a breathing barrier to protect yourself from possible exposure to the poison. |
Register, complete your quiz and have your personalized certification card in your mailbox!
Takes less than 2 minutes to sign up.
Chapter 11: A sprain is the tearing of the ligaments at a joint. Use the RICE method when dealing with a sprain or strain.


